

Key Takeaways
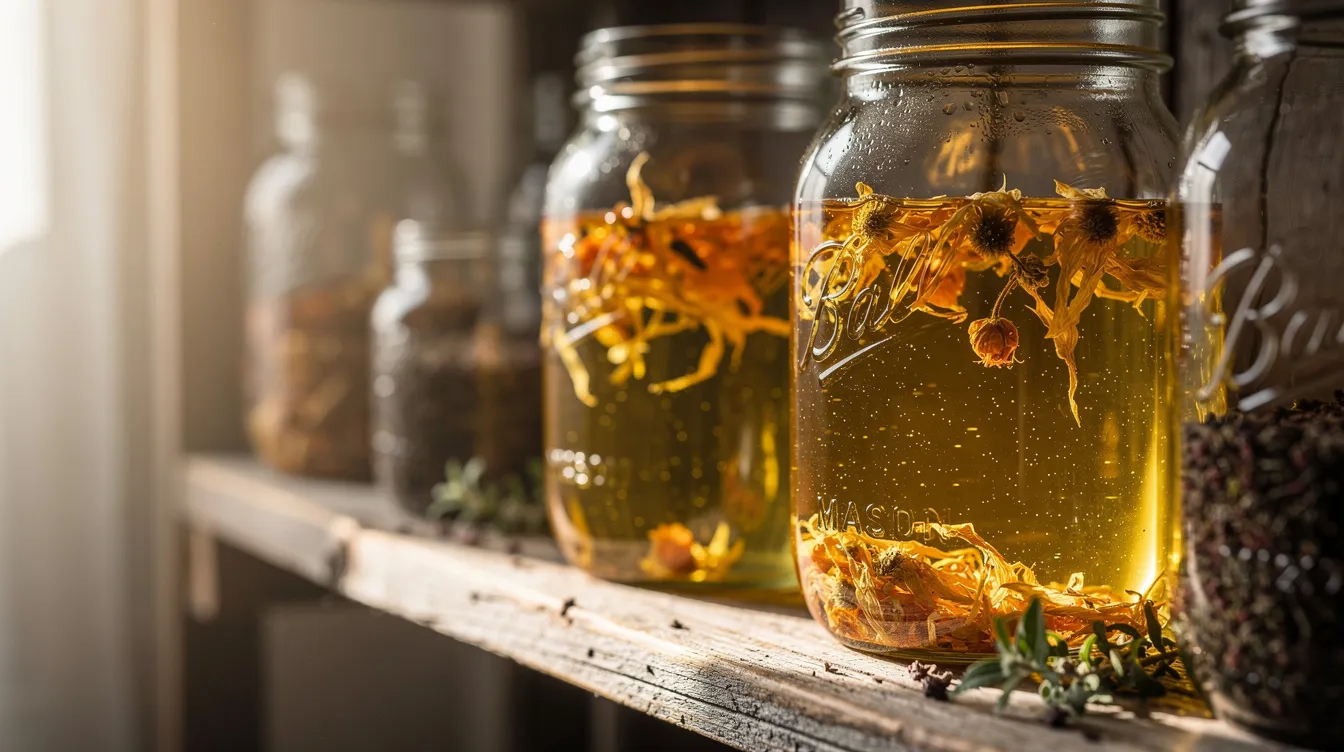
Infusing oils with dried botanicals like calendula, chamomile, or madder root is one of the most satisfying ways to add natural colors and gentle skin benefits to your cold process soap and hot process creations. The process draws from centuries of herbal tradition, and the results speak for themselves: smooth, evenly colored bars without the gritty texture that comes from adding powders directly.
The two main methods for creating herbal infusions are the cold infusion method (requiring 2–6 weeks at room temperature) and the heat infusion method (taking 20 minutes to 6 hours using a double boiler or crock pot). Both approaches work beautifully when you start with stable carrier oils like olive oil, high-oleic sunflower, or sweet almond oil, and fully dried herbs to prevent mold and rancidity.
When using infused oils in your soap recipe, they typically replace a portion of your base oils rather than adding on top. This means you’ll need to recalculate your lye solution whenever oil amounts change. Proper straining through cheese cloth or a coffee filter, storage in dark glass, and optional antioxidants like vitamin E help your infused oils last as long as the original carrier oil—often 12 to 18 months when stored in a cool, dark place.
Introduction: Why Infuse Oils for Soap Making?
For generations, handmade soap makers have turned to infused oils as a way to color their bars naturally and add gentle herbal benefits without reaching for synthetic dyes. The practice traces back to regions like Provence, France, where olive oil steeped with lavender or rosemary was integral to traditional savon de Marseille. Today, soap making with botanical infusions continues this slower, more intentional approach to skincare.
When we talk about infused olive oil or any other oil infusion, we mean a carrier oil that has been steeped with herbs, roots, seeds, or spices to extract their color and fat-soluble compounds. The oil gradually pulls pigments and beneficial properties from the plant matter, creating something richer than the original.
There are three core reasons soap makers choose to infuse their oils: smoother natural color without gritty bits, targeted skin feel (whether soothing, invigorating, or calming), and a more “from-scratch” botanical story for finished bars. This guide focuses on practical, step-by-step methods for infusing oils safely and successfully. While some infused oils carry a light scent, they’re primarily used for color and skin benefits—your dedicated fragrance typically comes from essential oils added at trace.
Understanding Oil Infusions in Soap Making
In the context of soap making, an oil infusion differs from culinary infusions in one important way: we’re extracting fat-soluble compounds that will survive the saponification process and contribute to the finished bar’s appearance and feel.
Here’s what happens during the infusion process:
-
The carrier oil gradually dissolves lipophilic (fat-loving) pigments from plant material
-
Carotenoids in annatto seeds create orange hues
-
Flavonoids in calendula extract into soothing golden tones
-
The process avoids water-soluble elements that could introduce moisture and spoilage
The finished infused oil behaves identically to plain carrier oil in terms of saponification value. You won’t need to change your lye calculations based on the herb—only when your overall oil ratios shift.
Compared to adding powders or petals directly to soap batter, infusions offer significant advantages. You avoid scratchy texture and get more even, non-speckled color throughout your bars. The natural colorants distribute smoothly rather than clumping or settling.
One batch of infused oil serves many purposes beyond natural soap. Use it in salves, balms, body oils after shower, bath bombs, and scrubs. This versatility makes the time investment worthwhile.
Choosing Carrier Oils and Botanicals
Your choice of oil and botanical determines both the color and shelf life of your infusion. Start with stable, long-lasting carrier oils that won’t go rancid before you can use them, keeping in mind how different oils for soap making affect hardness, lather, and conditioning.
Recommended Carrier Oils for Infusions:
|
Oil |
Shelf Life |
Soap Properties |
|---|---|---|
|
Olive oil |
12–18 months |
Conditioning, mild lather, softer bar |
|
High-oleic sunflower |
18–24 months |
Neutral profile, good stability |
|
Sweet almond oil |
12 months |
Excellent skin feel, mild nutty scent |
|
Rice bran |
12–18 months |
Adds creaminess, SAP 0.128–0.133 |
|
Grapeseed |
6–12 months |
Light, non-greasy |
|
Avoid short-lived or strong-smelling other oils like unrefined hemp or sesame for long infusions unless you’ll use them quickly. Coconut oil isn’t ideal for infusions due to its solid state, though it works well as part of your soap recipe base. |
|
|
Why Dried Herbs Matter
Fresh herbs contain 40–80% water, which promotes mold and bacterial growth in oil. Always use fully dried herbs with moisture content below 10%. Air-dry botanicals for 1–2 weeks, or use a dehydrator at 35–45°C (95–115°F).
Popular Botanicals for Soap Oil Infusions:
-
Calendula petals: golden-yellow, soothing for sensitive skin
-
Madder root: pink to red tones, pH-stable color
-
Alkanet root: purple-grey, intensifies in gel phase
-
Annatto seeds: vibrant orange, pairs well with citrus
-
Chamomile flowers: pale yellow, calming properties
-
Rosemary leaf: gentle green, natural antioxidant support
-
Safflower petals: soft yellow tones
-
Olive leaf: muted green

Methods for Infusing Oils (Cold and Heat Infusions)
There are two main methods for creating infused oils: room-temperature infusion over several weeks and various gentle-heat options that work in hours. Each has its place depending on your timeline and equipment.
Choose the cold infusion method when you have patience and want maximum simplicity. It’s hands-off and preserves heat-sensitive compounds beautifully. Choose heat infusion when you need soap oil within the same day or week, or when working with tough materials like roots.
Both methods work best with dried botanicals. Strong, direct heat should always be avoided—it burns herbs and degrades your favorite oil. Temperatures should stay below 65°C (150°F) during any heat method.
Typical Infusion Time Ranges:
-
Cold infusions: 2–6 weeks
-
Stovetop/double boiler: 1–3 hours
-
Slow cooker/crock pot: 20 minutes–4 hours (on low setting)
Cold (Room-Temperature) Infusion: 2–6 Weeks
The cold infusion method is the most hands-off approach, ideal for olive oil and high-oleic sunflower stored in sealed glass jars. It preserves volatile compounds better than heat, making it perfect for delicate flowers like chamomile.
Simple Ratio: Fill a jar 1/3 to 1/2 with dried botanicals and top with oil, or use roughly 1 part dried herb to 5 parts oil by weight (e.g., 50g calendula per 250g oil).
Step-by-Step Process:
-
Place dried herb in a clean, completely dry jar
-
Cover completely with oil, leaving 1–2 cm headspace
-
Stir or tap the jar to release air bubbles
-
Cap tightly and label with date and ingredients
-
Store in a cool, dark place (15–21°C / 60–70°F) for 2–6 weeks
Gently shake or roll the jar every few days to keep botanicals submerged and encourage extraction. Check regularly that no condensation or mold appears—any moisture means starting over.
Around week 3–4, observe the color and strain your infusion. A more concentrated infusion isn’t always better if the oil approaches its shelf life limit. Trust your senses: rich color, pleasant herbal scent, and clear oil indicate success.
Gentle Heat Infusion: Double Boiler or Crock-Pot
Gentle heat speeds up extraction dramatically, making it ideal when soap is planned for the same week. This infusion method requires more monitoring but delivers results in hours rather than weeks.
Equipment Options:
-
Double boiler (or heat-safe bowl over simmering water)
-
Electric slow cooker/crock pot on “warm” or low
Herb-to-Oil Guideline: Use approximately 1 tablespoon dried herb per 1 ounce (28g) of oil. For potent colorants like madder root or alkanet, use slightly less to prevent overly dark or murky results.
Heat Infusion Process:
-
Place herbs and oil in a heat-safe jar or directly in the crock pot
-
Ensure botanicals are fully submerged
-
Gently heat between 38–65°C (100–150°F)
-
Maintain for 1–4 hours depending on desired color strength
-
Stir occasionally and watch for any boiling (avoid this)
-
Turn off heat once oil is richly colored
For a hot water bath method, keep the slow cooker 1/3–1/2 full of water around your jars. Never let water levels drop below jar bottoms. This indirect heat prevents scorching and gives you better temperature control.
About an hour is often sufficient for flowers and leaves. Tough roots like madder may benefit from 3–4 hours on low heat. Some makers run their crock pot on cycles over 1–2 weeks for exceptionally potent double infusions.

Step-by-Step: Making and Straining Infused Oils
Regardless of your chosen infusion method, the final steps of straining and storage determine whether your infused oils last months or spoil prematurely. A clear, particle-free oil performs better in recipes and stores longer.
The Complete Sequence:
-
Preparation: Gather clean, dry equipment and bottles
-
Infusion period: Complete your chosen method
-
Testing: Check color, scent, and clarity
-
Straining: Remove all plant matter
-
Bottling: Transfer to dark glass containers
-
Labeling: Record contents, oil type, and dates
-
Storing: Place in cool, dark location
Straining Tools:
-
Fine mesh sieve (first pass)
-
Unbleached coffee filter (second pass)
-
Several layers of cheese cloth
-
Reusable nut milk bags
-
Heat sealable tea bag for pre-packing herbs (simplifies cleanup)
Warm your oil slightly before straining—not hot, just around 38–49°C (100–120°F). This reduces viscosity and minimizes loss. Gently press the leftover herbs to recover more oil, but don’t force tiny particles through the strainer.
Pour strained oil into amber or cobalt glass bottles or jars, leaving minimal headspace to reduce oxygen exposure. Label clearly: “Calendula in Olive Oil, infused Feb 15–Mar 15, 2026.”
Any visible moisture, cloudiness, or floating plant bits should prompt re-straining through a finer filter. Those particles can introduce spoilage over time. When in doubt, strain again.
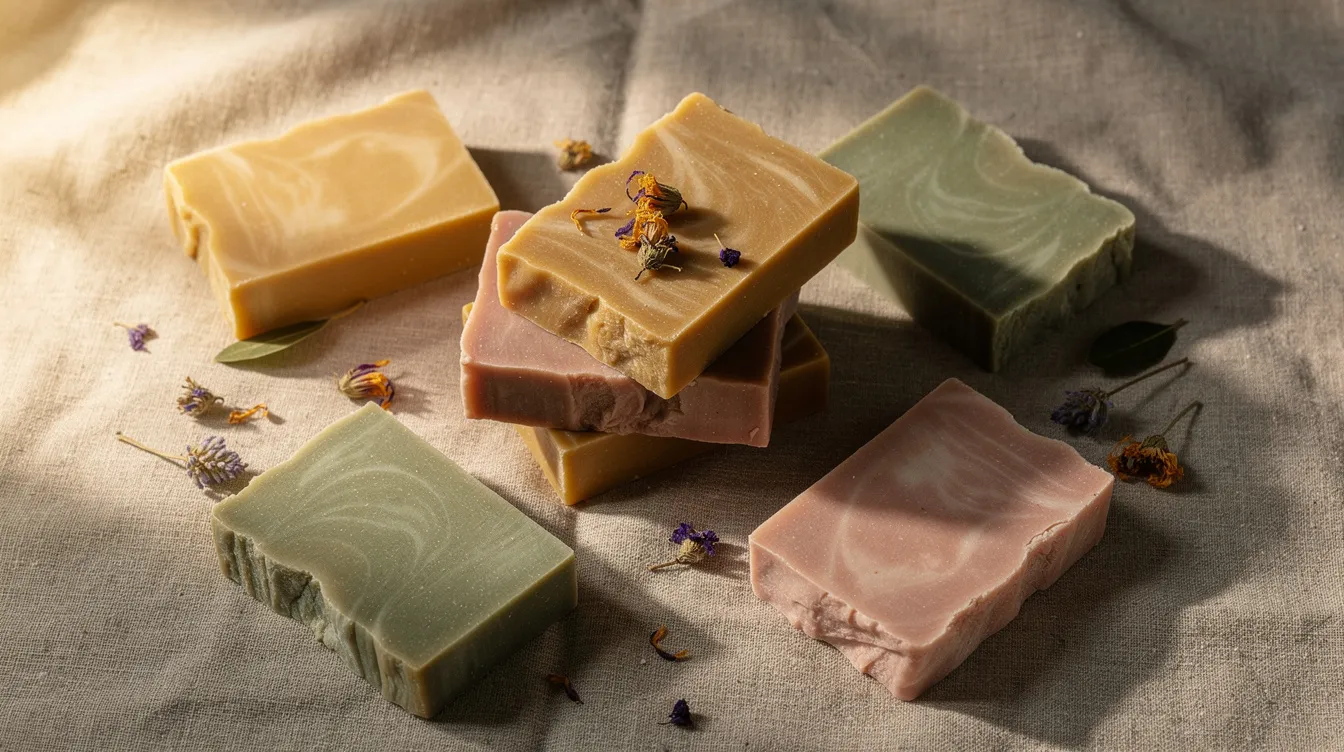
Popular Infused Oils and Their Effects in Soap
Different herbs create distinct colors and contribute subtle beneficial properties to your finished bars. While skin feel changes are gentle, the visual impact can be dramatic, and can help your bars stand out in a market where traditional bar soap is evolving alongside liquid and body wash options.
Mini-Catalog of Popular Infused Oils:
|
Infused Oil |
Typical Soap Color |
Skin Mood |
Notes |
|---|---|---|---|
|
Buttery golden-yellow |
Soothing, gentle |
Ideal for baby or sensitive skin bars |
|
|
Chamomile in sweet almond oil |
Pale creamy yellow |
Calming |
Perfect for bedtime soaps |
|
Annatto seeds in sunflower |
Vibrant orange |
Brightening |
Pairs beautifully with citrus essential oils |
|
Madder root in olive oil |
Pink to red |
Traditional |
May shift to peach in high pH; insulate for gel phase |
|
Alkanet root in rice bran |
Purple-grey |
Sophisticated |
Color intensifies dramatically in gel phase |
|
Gentle green |
Invigorating |
Adds natural antioxidants |
|
|
Safflower petals in grapeseed |
Soft yellow |
Neutral |
Light, non-greasy feel |
|
Actual color results depend on several factors: the percentage of infused oil in your soap recipe, presence of titanium dioxide or other additives, whether the soap goes through gel phase, and cure time. Colors may shift or fade over 4–6 weeks of curing. |
|
|
|
For indigo powder or other natural colorants that don’t infuse well, you might add them directly at trace. If you’re new to formulating recipes, an ultimate guide to cold process soap making can help you place these infusions in a balanced base recipe. But for most botanicals, the infusion approach delivers smoother, more predictable results.
Using Infused Oils in Cold and Hot Process Soap Recipes
Infused oils are treated as part of your total oil weight—not as an extra additive. This means your recipe math and lye calculations must reflect the actual oils present, including the base carrier oil of your infusion, whether you’re formulating bar soap vs. liquid soap recipes.
Practical Usage Ranges:
-
Start with 10–30% of total oil weight as infused oil
-
Example: 200–600g infused oil in a 2,000g total oil batch
-
Adjust in future batches based on color and feel
Strongly coloring oils like annatto, madder, or alkanet work best in specific portions of batter for swirls or layers. Gentler infusions like calendula can be used at higher percentages throughout the entire batch.
Your superfat levels and hardness/lather balance still depend on the base oils selected. Infused olive oil behaves exactly like regular olive oil in SAP value (around 0.134–0.135 for sodium hydroxide). Too much olive oil creates softer bars requiring longer cure times, regardless of infusion.
Hot process soaps may show slightly different colors from the same infusion due to higher cooking temperatures. Some herbal colors intensify in full gel phase while others dull—madder root pink sometimes shifts toward tan. Test small batches first.
Combining Infused Oils with Essential Oils and Other Additives
Since infused oils contribute primarily color and mild skin benefits, scent typically comes from essential oils or fragrance oils added at trace. The natural benefits of your infusion complement rather than replace your fragrance choices.
Complementary Pairings:
-
Lavender essential oil with alkanet-infused oil for purple lavender bars
-
Citrus oils with annatto-infused oil for sunny orange soaps
-
Chamomile essential oil with calendula-infused oil for gentle bedtime bars
-
Tea tree with rosemary-infused oil for invigorating green bars
Always follow conservative usage rates for essential oils, especially comparing rinse-off soaps to leave-on skincare products. Research dermal maximums before adding any new oil to your recipes.
Additional other additives like clays, milks, sugars, or salts may alter color or trace speed. Change only one or two variables at a time when developing new formulas. Fragrance oils sometimes accelerate trace or discolor soap to tan or brown, which interacts unpredictably with subtle herbal colors.
Keep notes on what works. Your soap-making notebook becomes invaluable as you learn how different herbs, essential oils, and other projects interact, especially if you also sell or gift a handmade soap collection and want consistent results.
Shelf Life, Storage, and Safety Considerations
Your infused oils will only ever be as stable as the carrier oil used. If olive oil typically lasts 12–18 months, your calendula-in-olive infusion has a similar lifespan when stored correctly.
Ideal Storage Conditions:
-
Temperature: Below 21°C (70°F), ideally 10–15°C
-
Light: Minimal—use amber or cobalt glass
-
Oxygen: Sealed tightly with minimal headspace
Label bottles with “use by” dates based on the carrier oil’s known shelf life. Making small batches ensures oils get used while fresh rather than sitting forgotten.
Signs of Rancidity:
-
Crayon-like or “old nuts” odor
-
Sticky or tacky feel
-
Darkening or clouding
-
DOS (dreaded orange spots) risk in finished soap
Discard any questionable infusions. Using rancid oil introduces potential irritants and creates soap prone to developing orange spots during cure.
Safety and Allergens:
Botanicals like chamomile and calendula belong to the Asteraceae family and can bother people with ragweed allergies. Always list full ingredients on labels and encourage customers to patch-test new products. Adding antioxidants such as vitamin E (at about 0.5–1%) or rosemary extract can slow oxidation, though they cannot rescue already rancid oil.
Never use fresh herbs for long-term infusions—introducing water content above 10% invites mold growth within 1–2 weeks.
Troubleshooting Common Problems with Infused Oils in Soap
Even experienced soap makers encounter unexpected color, texture, or scent outcomes when using infused oils. Most issues have straightforward solutions.
Common Issues and Solutions:
|
Problem |
Likely Cause |
Solution |
|---|---|---|
|
Pale color |
Weak infusion or low % used |
Steep 4+ weeks; use 20%+ in recipe |
|
Color morphing |
pH or gel phase effects |
Insulate for full gel; accept variation |
|
Speckles/grit |
Incomplete straining |
Use tea bag pre-packing; double-strain |
|
Scent fading |
Saponification destroys herb volatiles |
Rely on essential oils at 2–4% for scent |
|
DOS (orange spots) |
Old or oxidized oil |
Sniff test before use; discard if rancid |
|
Test new infusions in small 500g or 1,000g oil-weight batches before scaling up production. This prevents wasting large amounts of ingredients on unsuccessful experiments. |
|
|
Keep a soap-making notebook recording exact infusion dates, ratios, herb sources, and cure observations. Over time, you’ll refine your methods and develop recipes perfectly suited to your preferences.
Frequently Asked Questions About Infusing Oils for Soap Making
Can I use fresh herbs instead of dried ones for oil infusions?
Fresh herbs contain significant water—typically 40–80%—which promotes mold and bacterial growth in oil infusions, especially over weeks of storage. This moisture creates conditions where bacteria thrive, potentially ruining your entire batch.
If fresh herbs must be used, wilt or partially dry them first, infuse with gentle heat rather than cold methods, and use the oil promptly rather than storing long-term. For most soap projects, fully dried botanicals are safer and more reliable, producing clear infusions with predictable shelf life.
How long do infused oils stay effective once they are in finished soap bars?
Once oils undergo the saponification process, they’re no longer free oils. However, unsaponified “superfat” and botanical compounds can still slowly oxidize over time. Most well-formulated natural soaps perform best within 6–18 months, depending on recipe and storage conditions.
Keep finished bars in a cool, dry location out of direct light. Herbal colors may fade gradually, and bars made with heavily oxidized oils are more prone to dreaded orange spots and off odors.
Does infusing an oil change its lye calculation or SAP value?
Adding herbs does not materially change the saponification value of the base oil. Standard SAP numbers for your carrier oil still apply—olive oil infused with calendula calculates the same as plain olive oil.
What changes is the percentage of each oil in your formula when swapping plain oil for infused oil. Always run recipes through a reputable lye calculator after adjusting oil weights, even when only switching part of one oil type.
Can I reuse the same herbs for multiple infusions?
Most desirable compounds extract during the first infusion. The initial steep pulls 70–90% of available pigments and beneficial constituents from the plant material. Reusing botanicals produces much weaker, less effective oil.
Compost or discard spent herbs after pressing out the last oil rather than stretching them into another batch. If you experiment with a second infusion, label clearly and expect subtler color and benefits.
Is there a maximum percentage of infused oil I can use in a soap recipe?
There’s no fixed safety maximum for infused oil itself. Practical limits depend on the underlying carrier oil and your desired bar qualities. Starting with 10–30% of total oils as infused oil is a reasonable range, increasing cautiously after evaluating color, lather, and hardness.
Any recipe heavily dominated by one soft oil—whether infused or not—produces a softer bar requiring longer cure time. Balance your infused olive oil with harder oils like coconut oil to achieve bars that unmold cleanly and last well in the shower.


